這篇教學將帶您深入 Word (.docx) 的本質——它其實只是一個 Zip 壓縮包。
我們將實作一個「切片手術」:
切除 (Slice):保留指定段落,切除其餘內容。
清創 (Prune):深入 Zip 結構,移除因為切除內容而變成「孤兒」的未引用圖片,大幅縮小檔案體積。
核心概念
複製策略:不要從頭建立新檔,而是「複製整份文件」然後「刪除不要的」。
這樣能完美保留樣式 (Styles)、頁首頁尾 (Header/Footer) 和設定。
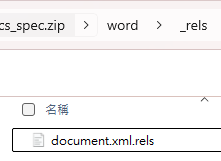
OOXML 關係:圖片存在 word/media/ 資料夾中,並透過 document.xml.rels 與內文建立關聯。只刪除內文圖片標籤,圖片實體檔案依然存在 Zip 中(導致檔案虛胖),必須手動清理。
- 環境準備與產生測試資料
首先,我們建立一個包含三個章節的 Word 文件。
第 1 章:文字
第 2 章:文字 + 紅色圖片 (我們打算保留這個章節)
第 3 章:文字 + 藍色圖片 (我們打算切除這個章節)
import os
from docx import Document
from docx.shared import Inches
from PIL import Image
import io

# 建立測試用的圖片 (紅色與藍色)
def create_dummy_image(color, filename):
    img = Image.new('RGB', (200, 200), color=color)
    img.save(filename)
    return filename

create_dummy_image('red', 'red.png')
create_dummy_image('blue', 'blue.png')

# 建立原始 Word 文件
doc = Document()
doc.add_heading('Chapter 1: Intro', level=1)
doc.add_paragraph('This is the introduction.')

doc.add_heading('Chapter 2: Target Content', level=1)
doc.add_paragraph('We want to KEEP this section and the red image.')
doc.add_picture('red.png', width=Inches(1.0))

doc.add_heading('Chapter 3: Unwanted Content', level=1)
doc.add_paragraph('We want to REMOVE this section and the blue image.')
doc.add_picture('blue.png', width=Inches(1.0))

source_path = 'source_doc.docx'
doc.save(source_path)

print(f"原始檔案已建立: {source_path}")
print(f"原始大小: {os.path.getsize(source_path)} bytes")原始檔案已建立: source_doc.docx
原始大小: 37460 bytes

生成的source_doc.docx:
- 核心步驟一:切片 (Slicing)
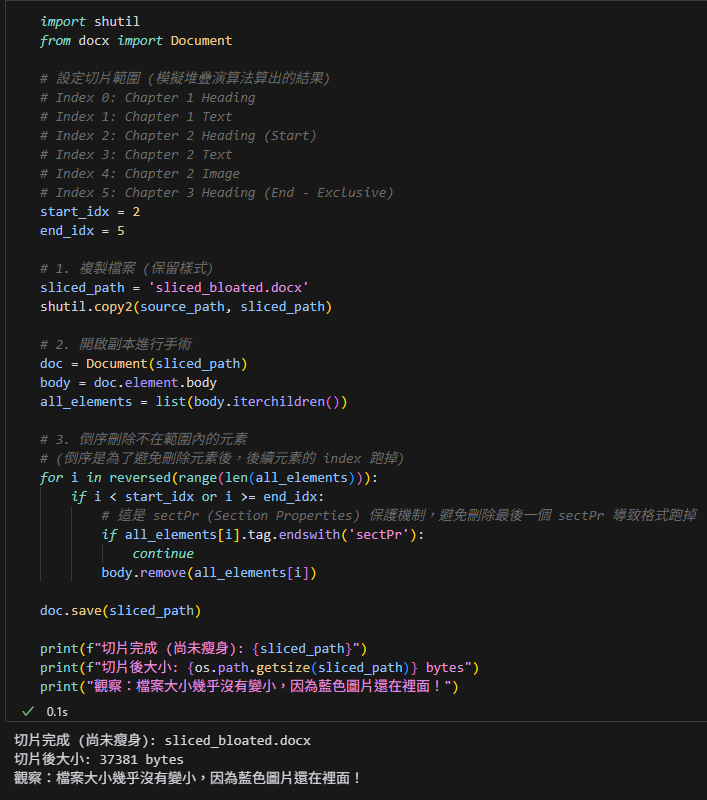
我們使用 python-docx 載入文件,保留 Chapter 2 (索引 2 到 5),刪除其餘部分。
注意:這一步雖然刪除了 Chapter 3 的文字和圖片標籤,但藍色圖片的實體檔案還留在 Zip 裡!
# %%
import shutil
from docx import Document

# 設定切片範圍 (模擬堆疊演算法算出的結果)
# Index 0: Chapter 1 Heading
# Index 1: Chapter 1 Text
# Index 2: Chapter 2 Heading (Start)
# Index 3: Chapter 2 Text
# Index 4: Chapter 2 Image
# Index 5: Chapter 3 Heading (End - Exclusive)
start_idx = 2
end_idx = 5

# 1. 複製檔案 (保留樣式)
sliced_path = 'sliced_bloated.docx'
shutil.copy2(source_path, sliced_path)

# 2. 開啟副本進行手術
doc = Document(sliced_path)
body = doc.element.body
all_elements = list(body.iterchildren())

# 3. 倒序刪除不在範圍內的元素
# (倒序是為了避免刪除元素後,後續元素的 index 跑掉)
for i in reversed(range(len(all_elements))):
    if i < start_idx or i >= end_idx:
        # 這是 sectPr (Section Properties) 保護機制,避免刪除最後一個 sectPr 導致格式跑掉
        if all_elements[i].tag.endswith('sectPr'):
            continue
        body.remove(all_elements[i])

doc.save(sliced_path)

print(f"切片完成 (尚未瘦身): {sliced_path}")
print(f"切片後大小: {os.path.getsize(sliced_path)} bytes")
print("觀察:檔案大小幾乎沒有變小,因為藍色圖片還在裡面!")輸出結果:
sliced_bloated.docx
3. 核心步驟二:瘦身 (Pruning)
這是最精彩的部分。我們直接操作 OOXML (Zip) 結構:
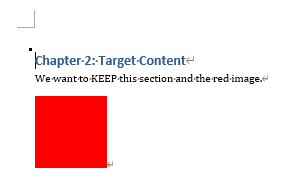
- 解析 document.xml 找出還活著的關聯 ID (rId)。
- 解析
document.xml.rels找出這些 rId 對應的檔案。 - 重寫 Zip,只保留有被引用的媒體檔案。
import zipfile
import tempfile
import shutil
from lxml import etree

final_path = 'final_clean.docx'

# 定義 XML Namespace
ns_map = {
    'w': 'http://schemas.openxmlformats.org/wordprocessingml/2006/main',
    'r': 'http://schemas.openxmlformats.org/officeDocument/2006/relationships',
    'pkg': 'http://schemas.openxmlformats.org/package/2006/relationships'
}

# 準備暫存檔
with tempfile.NamedTemporaryFile(delete=False) as tmp:
    tmp_zip_path = tmp.name

with zipfile.ZipFile(sliced_path, 'r') as zfin, \
     zipfile.ZipFile(tmp_zip_path, 'w', zipfile.ZIP_DEFLATED) as zfout:

    # A. 讀取 document.xml 找出所有使用中的 rId
    doc_xml = zfin.read('word/document.xml')
    doc_tree = etree.fromstring(doc_xml)
    # 抓取所有 r:embed, r:link, r:id 屬性值
    used_rids = set(doc_tree.xpath("//@r:embed | //@r:link | //@r:id", namespaces=ns_map))

    # B. 讀取 document.xml.rels 建立白名單 keep_files
    # 以及黑名單 rels_to_remove ,要移除的Relationship節點
    rels_xml = zfin.read('word/_rels/document.xml.rels')
    rels_tree = etree.fromstring(rels_xml)

    keep_files = set()
    rels_to_remove = []

    for rel in rels_tree.xpath("//pkg:Relationship", namespaces=ns_map):
        """ rel解析後:
        <Relationship Id="rId324"
        Type="http://schemas.openxmlformats.org/officeDocument/2006/relationships/image"
        Target="media/image309.png" />
        """
        rid = rel.get('Id')  #"rId324"
        target = rel.get('Target') #"media/image309.png"

        # 正面表列:如果是 media 或 embeddings,且 rId 沒被使用,就標記刪除
        if target.startswith(('media/', 'embeddings/')):
            if rid not in used_rids:
                rels_to_remove.append(rel)
                # continue # 跳過,不加入 keep_files
            else:
                # 要保留的圖片,補上 word/ 前綴以匹配 Zip 路徑
                keep_files.add('word/' + target)

        # 非媒體類 (如 styles.xml, theme.xml) 全部保留
        else:
            pass

    # C. 從 XML 樹中移除未使用的 Relationship 節點
    if rels_to_remove:
        for r in rels_to_remove:
            r.getparent().remove(r)
        # 更新 rels 內容
        new_rels_xml = etree.tostring(rels_tree, encoding='utf-8', xml_declaration=True, standalone=True) #byes
    else:
        new_rels_xml = rels_xml

    # D. 重寫 Zip (過濾孤兒檔案)
    for item in zfin.infolist():
        # 如果是我們要修改的 rels 檔,寫入新內容
        if item.filename == 'word/_rels/document.xml.rels':
            zfout.writestr(item, new_rels_xml)
            continue

        # 如果是 media 資料夾下的檔案,且不在白名單中 -> 刪除 (跳過不寫入)
        if item.filename.startswith(('word/media/', 'word/embeddings/')):
            if item.filename not in keep_files:
                print(f"移除孤兒檔案: {item.filename}")
                continue

        # 其他檔案原樣複製
        zfout.writestr(item, zfin.read(item.filename))

# 移動暫存檔到最終路徑
shutil.move(tmp_zip_path, final_path)

print(f"\n最終檔案: {final_path}")
print(f"最終大小: {os.path.getsize(final_path)} bytes")document.xml.rels
rels_tree = etree.fromstring(rels_xml)
其子元素最重要的兩個屬性為Id, Target
Target的屬性值為相對路徑,
需要前綴 “word/” 才能跟zipfile讀取的路徑比較
移除孤兒檔案: word/media/image2.png
最終檔案: final_clean.docx
最終大小: 37152 bytes:

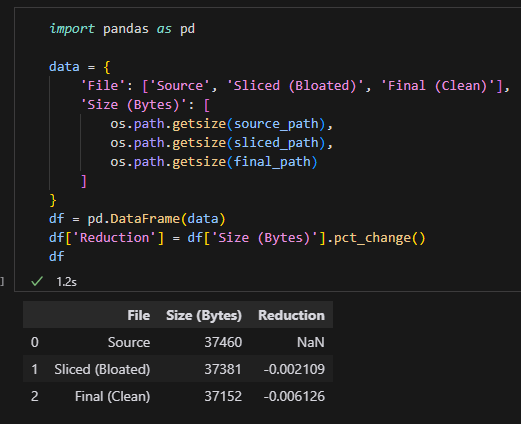
4. 結果驗證
比較三個檔案的大小,您會發現 final_clean.docx 的大小顯著小於 sliced_bloated.docx,證明藍色圖片已被成功移除。
# %%
import pandas as pd

data = {
    'File': ['Source', 'Sliced (Bloated)', 'Final (Clean)'],
    'Size (Bytes)': [
        os.path.getsize(source_path),
        os.path.getsize(sliced_path),
        os.path.getsize(final_path)
    ]
}
df = pd.DataFrame(data)
df['Reduction'] = df['Size (Bytes)'].pct_change()
dfdf:
推薦hahow線上學習python: https://igrape.net/30afN
我們產生的「測試圖片」太小了(純色圖片壓縮率極高),
導致「圖片本身的大小」相對於「Word 檔案結構的開銷(XML, Styles, Fonts)」來說微不足道。
純色圖片極小:
我們用 PIL 產生的 200×200 純色 PNG 圖片,經過壓縮後可能只有 幾百 bytes。
所以刪除一張圖片,檔案大小只減少了 37381 – 37152 = 229 bytes。
這完全符合預期(一張純色 PNG 大概就是這麼小)。
Word 檔案的基底開銷:
一個空的 .docx 檔案,
光是包含基本的 styles.xml, theme.xml, settings.xml 等等,
大小就可能有 10KB ~ 30KB。
所以 37KB 的檔案中,絕大部分是 Word 的「骨架」,而不是圖片。
如何驗證「瘦身」真的有效?
我們需要讓圖片「有感」一點。我們可以用 os.urandom 產生雜訊圖片,
或者直接產生大一點的圖片,這樣刪除後的效果就會非常顯著。
請嘗試修改 第 1 步:產生測試資料 的程式碼,改用這段產生「大圖片」的邏輯:
# %%
import os
from docx import Document
from docx.shared import Inches
from PIL import Image
import io
import numpy as np

# 建立測試用的圖片 (使用隨機雜訊,讓檔案變大且難以壓縮)
def create_heavy_image(color, filename, size=(1000, 1000)):
    # 產生隨機雜訊 (這樣 PNG 壓縮不下來,檔案會很大)
    # 使用 numpy 產生隨機像素
    arr = np.random.randint(0, 255, (size[0], size[1], 3), dtype=np.uint8)
    img = Image.fromarray(arr, 'RGB')
    img.save(filename)
    return filename

print("正在產生大型測試圖片 (可能需要幾秒鐘)...")
create_heavy_image('red', 'red.png')   # 這張會很大 (約 2-3 MB)
create_heavy_image('blue', 'blue.png') # 這張也會很大

# 建立原始 Word 文件
doc = Document()
doc.add_heading('Chapter 1: Intro', level=1)
doc.add_paragraph('This is the introduction.')

doc.add_heading('Chapter 2: Target Content', level=1)
doc.add_paragraph('We want to KEEP this section and the red image.')
doc.add_picture('red.png', width=Inches(3.0))

doc.add_heading('Chapter 3: Unwanted Content', level=1)
doc.add_paragraph('We want to REMOVE this section and the blue image.')
doc.add_picture('blue.png', width=Inches(3.0))

source_path = 'source_doc.docx'
doc.save(source_path)

print(f"原始檔案已建立: {source_path}")
print(f"原始大小: {os.path.getsize(source_path) / 1024 / 1024:.2f} MB")重新執行後續的步驟,最終結果:
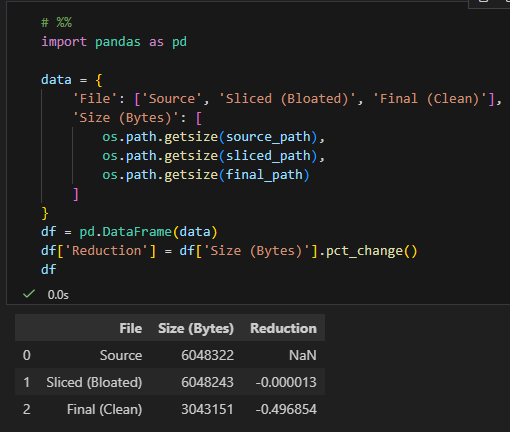
數據完美驗證:
Sliced (Bloated): 6048243 bytes。
只比原始檔案少了 79 bytes(大概就是刪掉的那幾行文字的 XML 標籤大小)。
證明:單純用 python-docx 刪除內容,不會刪除圖片實體檔案。
Final (Clean): 3043151 bytes。
減少了約 49.69%。
證明:我們的 prune_docx 函式成功地深入 Zip 結構,精準地移除了那張約
3MB 的藍色圖片,同時保留了紅色圖片。
這套流程(複製 -> 切片 -> 瘦身)
現在已經被證實是處理 Word 文件分割與優化的黃金準則。
推薦hahow線上學習python: https://igrape.net/30afN
核心邏輯:DOCX 切片與瘦身
這套流程的核心哲學是:「與其重建,不如雕刻」。
我們不嘗試在一個空白的新檔案中重建內容
(因為樣式、頁首頁尾太難完美複製),
而是複製整個檔案,然後把不要的部分「雕刻」掉。
第一階段:切片 (Slicing) —— 雕刻法
目標:產生一份視覺上正確,包含指定章節的文件。
複製 (Clone):
直接複製原始檔案 (source.docx) 成為副本 (sliced.docx)。
原因:這樣能完美繼承原始文件的所有「DNA」
(樣式 Styles、頁首頁尾、版面設定、字型)。
移除 (Remove):
使用高階工具 (python-docx) 打開副本。
保留指定範圍(例如 Chapter 2)的段落。
刪除範圍以外的所有內容。
結果:打開 Word 看起來是對的,但檔案虛胖。
因為雖然你在內文中刪除了圖片的「標籤」,
但圖片的「實體檔案」還留在 Zip 壓縮包的深處。
第二階段:瘦身 (Pruning) —— 清道夫
目標:移除虛胖,物理刪除未使用的媒體檔案
在此階段,我們跳脫 Word 文件的層次,
直接將 DOCX 視為 Zip 壓縮包 進行底層操作。
核心邏輯採用「一次遍歷,雙向分流,三流重組」的高效策略。
- 盤點需求 (Scan Document)
動作:解析內文 (document.xml)。
目的:統計目前內文實際參照了哪些「資源 ID」(rId)。 - 一次遍歷,雙向分流 (Single Pass Classification)
遍歷 document.xml.rels 關聯表,
針對媒體檔(指向 media/ ),
利用 if/else 進行高效分流:
黑名單 (Blacklist)
若 rId 未被使用。
處置:標記為待刪除節點 (rels_to_remove),
隨後從 XML Tree 中移除該孤兒節點。
白名單 (Whitelist)
若 rId 被使用 。
處置:加入保留檔案清單 (keep_files)。
- 三流重組 (Three-Stream Repack)
建立新 Zip 檔案時,將檔案分為三類處理,確保結構完整且體積最小化:
Stream 1 (Update):若是 document.xml.rels,寫入修剪後的新 XML
內容。
Stream 2 (Delete):若是孤兒檔案 (不在白名單中),直接跳過不寫入 (物理刪除)。
Stream 3 (Copy):其餘所有檔案,原樣複製到新壓縮包。
總結圖解
- 原始狀態:[內文: A, B, C] + [圖片: A, B, C] = 5 MB
- 切片後:[內文: B
] + [圖片: A, B, C] = 5 MB (視覺上只有 B,但圖片都在)
3. 瘦身後:[內文: B] + [圖片: B] = 2 MB (真正的乾淨)
推薦hahow線上學習python: https://igrape.net/30afN
如果header / footer / number 也有使用到圖片希望保留,
換句話說, sample.zip\word_rels 中
不只有一個 document.xml.rels
可以參考以下
更新keep_files:
            # --- Step C: 分析其他 .rels 檔 (建立全域白名單) ---
            # 核心任務:保留。單純掃描,把所有看到的 media 引用都加入 keep_files 白名單。
            # 副作用:無。只讀不改。
            # 即使您的檔案目前只有 document.xml.rels,但若文件包含頁首/頁尾圖片,
            # 關聯會存在 header1.xml.rels / footer1.xml.rels 中。
            # 若跳過此步,這些僅存在於頁首尾的圖片會被誤判為孤兒而刪除。
            other_rels = [f for f in all_files if f.endswith('.rels') and f != doc_rels_path]

            for rel_file in other_rels:
                try:
                    xml_bytes = zf.read(rel_file)
                    root = etree.fromstring(xml_bytes, parser=parser)

                    is_in_word_rels = rel_file.startswith('word/_rels/')

                    for rel in root.xpath("//pkg:Relationship", namespaces=ns_map):
                        target = rel.get('Target')

                        # 正面表列: 只保留明確指向 media/ 或 embeddings/ 的參照
                        # 這是因為我們只打算刪除這類型的孤兒檔案,其他類型的參照 (如 styles.xml)
                        # 即使沒加入 keep_files 也不會被刪除
                        # 且在 Word 結構中,參照內部圖片通常都是相對路徑且以 media/ 開頭
                        if target and target.startswith(('media/', 'embeddings/')):
                            resolved = target
                            if is_in_word_rels and not target.startswith('word/'):
                                resolved = 'word/' + target
                            keep_files.add(resolved)
                except Exception:
pass推薦hahow線上學習python: https://igrape.net/30afN
我們將 DOCX 視為一個 Zip 資料庫,
目標是達成「實體檔案」與「邏輯關聯」的同步瘦身。
核心邏輯:盤點、修訂、重組
- 盤點 (Inventory) —— 誰在舞台上?
動作:解析內文劇本 (word/document.xml)。
目的:找出所有實際被引用的資源 ID (rId)。
產出:一份「有效 rId 清單」。 - 修訂與過濾 (Edit & Filter) —— 關鍵決策點
這是最重要的一步,同時處理「邏輯層」與「物理層」。
動作:遍歷關聯目錄 (word/_rels/document.xml.rels)。
邏輯 (雙向同步處理):
針對 XML (邏輯層):如果發現某個 rId 指向媒體檔且沒被使用(孤兒),
我們先將這個關聯節點列入待刪除清單 (rels_to_remove)。
等到所有關聯都檢查完畢後,
再統一從 XML 樹狀結構(rels_tree)中移除這些節點。
目的:確保 Word 開檔時,不會因為「有目錄卻沒檔案」而報錯。
針對檔案 (物理層):如果發現某個 rId 指向媒體檔且有被使用,
將其路徑加入「白名單」。
目的:告訴打包工人這些檔案必須保留。
產出:
一份被竄改過的新 XML 內容
(已移除無效關聯,new_rels_xml:bytes)。
一份實體檔案白名單 (只包含要留下的圖片)。
- 全域掃描 (Global Scan) —— 安全網
動作:快速掃描其他 .rels (如頁首、頁尾)。
目的:防止誤刪版面裝飾圖片。
只要看到有引用媒體,通通加入「白名單」。 - 重組 (Repack) —— 執行瘦身
動作:建立新 Zip,從舊 Zip 搬運資料。
執行 (三路分流):
寫入新目錄:遇到 document.xml.rels 時,不複製舊檔,
而是寫入 Step 2 產生的 新 XML 內容。
丟棄孤兒:遇到 media/ 資料夾下的檔案,檢查白名單。
如果不在名單上,直接跳過不寫入(物理刪除)。
原樣複製:其他所有檔案(內文、樣式、字型等),原封不動複製過去。
總結
這套邏輯的精髓在於 「同步毀屍滅跡」:
我們不只把沒用的圖片檔丟掉(物理刪除),
還同時把目錄裡的紀錄塗改掉(邏輯刪除),
讓 Word 以為這些圖片從來沒存在過,達成完美的瘦身。
推薦hahow線上學習python: https://igrape.net/30afN
 套件繪製具有多個子圖的散佈圖且限定欄數?g = sns.relplot (data=tips, x=”total_bill”, y=”tip”, col=”day”, hue=”sex”,col_wrap=2, kind=”line”)")


 #Bytes → Element Object 與 lxml.etree.tostring(Element, encoding= “utf-8”) #Element Object → Bytes ; lxml.etree._Element; 處理 XML 時,盡量全程保持 Bytes (二進位) 狀態。")


: #range參數不含結束值")


![Python如何讀取excel檔(.xlsx)?如何用欄標籤提取某一直行?df=pandas.read_excel() ; df["欄標籤"] - 儲蓄保險王](https://savingking.com.tw/wp-content/uploads/2022/11/20221109163631_39-520x245.png)

近期留言