

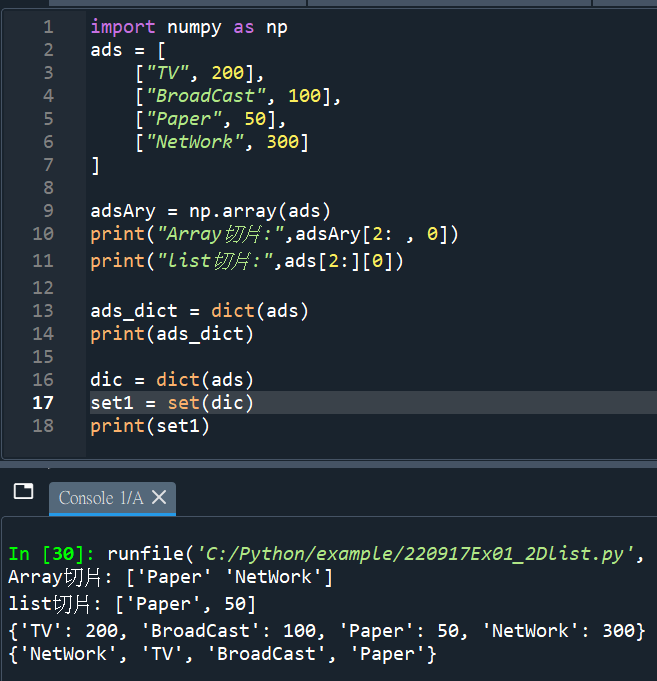
import numpy as np
ads = [
[“TV”, 200],
[“BroadCast”, 100],
[“Paper”, 50],
[“NetWork”, 300]
]
adsAry = np.array(ads)
print(“Array切片:”,adsAry[2: , 0])
print(“list切片:”,ads[2:][0])
#list中還有list,其實仍是1D,非2D,
#所以沒辦法像array一樣縱向切片
ads_dict = dict(ads)
print(ads_dict)
dic = dict(ads)
set1 = set(dic)
print(set1)
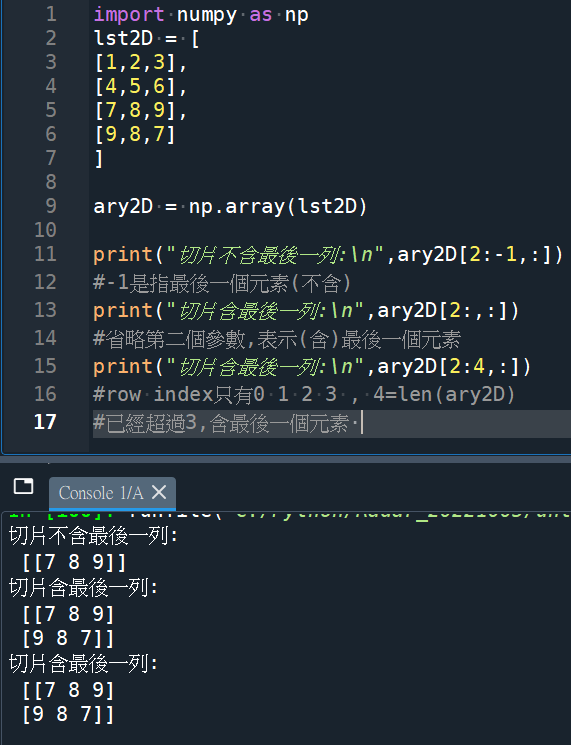
含或不含最後一列:
import numpy as np
lst2D = [
[1,2,3],
[4,5,6],
[7,8,9],
[9,8,7]
]
ary2D = np.array(lst2D)
print(“切片不含最後一列:\n”,ary2D[2:-1,:])
#-1是指最後一個元素(不含)
print(“切片含最後一列:\n”,ary2D[2:,:])
#省略第二個參數,表示(含)最後一個元素
print(“切片含最後一列:\n”,ary2D[2:4,:])
#row index只有0 1 2 3 , 4=len(ary2D)
#已經超過3,含最後一個元素
#list也可用一樣的方法
建立dict的兩種方法:
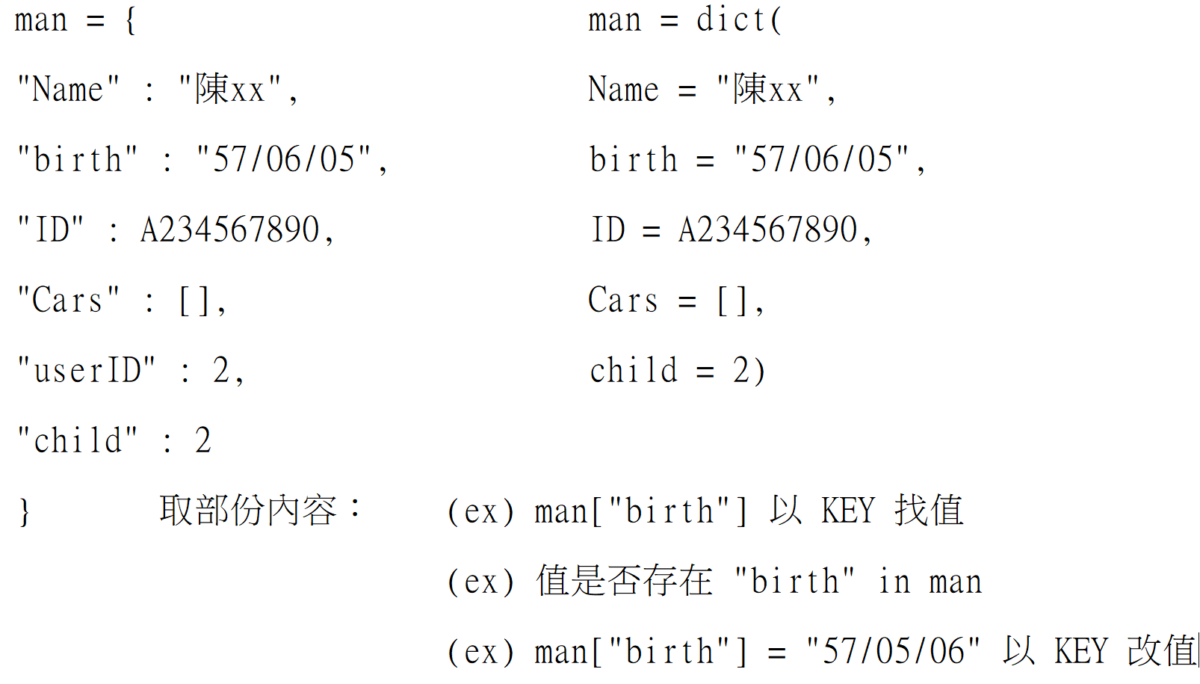
右邊的方法,
key必須符合變數的格式
(數字或數字起頭不行)
會將變數轉為str
左邊的方法
key可以用int
但建議用str
推薦hahow線上學習python: https://igrape.net/30afN


![Python 讀取 DOCX 圖片關聯:qn+find/findall 與 XPath 的實戰對照 from lxml import etree ; from docx.oxml.ns import qn; lxml.etree._Element.findall( f”.//{ qn(‘a:blip’) }” ) ; .get( qn(“r:embed”) ) #獲取 屬性名 ‘r:embed’ 的 屬性值(如: ‘rId4’) ; lxml.etree._Element.xpath( “//a:blip/@r:embed”, namespaces = NS) #/@r:embed = 獲取 屬性名 ‘r:embed’ 的 屬性值(如: ‘rId4’),使用.findall() 要先.findall()獲取List[_Element],再迴圈_Element.get()獲取屬性值, .xpath() 第一個參數path 使用”//a:blip/@r:embed” ,可直接獲取屬性值(List[str]如: [‘rId4’, ‘rId5’]) ; 如何對docx真實移除圖片瘦身? Python 讀取 DOCX 圖片關聯:qn+find/findall 與 XPath 的實戰對照 from lxml import etree ; from docx.oxml.ns import qn; lxml.etree._Element.findall( f”.//{ qn(‘a:blip’) }” ) ; .get( qn(“r:embed”) ) #獲取 屬性名 ‘r:embed’ 的 屬性值(如: ‘rId4’) ; lxml.etree._Element.xpath( “//a:blip/@r:embed”, namespaces = NS) #/@r:embed = 獲取 屬性名 ‘r:embed’ 的 屬性值(如: ‘rId4’),使用.findall() 要先.findall()獲取List[_Element],再迴圈_Element.get()獲取屬性值, .xpath() 第一個參數path 使用”//a:blip/@r:embed” ,可直接獲取屬性值(List[str]如: [‘rId4’, ‘rId5’]) ; 如何對docx真實移除圖片瘦身?](https://i2.wp.com/savingking.com.tw/wp-content/uploads/2025/11/20251119130848_0_3fbf6b.png?quality=90&zoom=2&ssl=1&resize=350%2C233)
![Python 進階實戰:深入 Word 核心,挖出那一坨 BLOB (含自省 Debug 技巧, BLOB= Binary Large Object) ; part = doc.part.rels[rid].target_part ; return part.blob if “ImagePart” in type(part).__name__ else None Python 進階實戰:深入 Word 核心,挖出那一坨 BLOB (含自省 Debug 技巧, BLOB= Binary Large Object) ; part = doc.part.rels[rid].target_part ; return part.blob if “ImagePart” in type(part).__name__ else None](https://i2.wp.com/savingking.com.tw/wp-content/uploads/2026/01/20260126111046_0_cd8751.png?quality=90&zoom=2&ssl=1&resize=350%2C233)


近期留言