在使用 BeautifulSoup 做網頁解析時,初學者最常困惑的就是:
find跟select_one差在哪?find_all跟select是不是一樣?
答案是:
✅ 概念上幾乎是「兩兩對應」的
❌ 但使用方式、彈性、風格不同
這篇文章會用可在 Jupyter 直接執行的程式碼,一步一步帶你理解。
一、先給你一張對照表(重點)
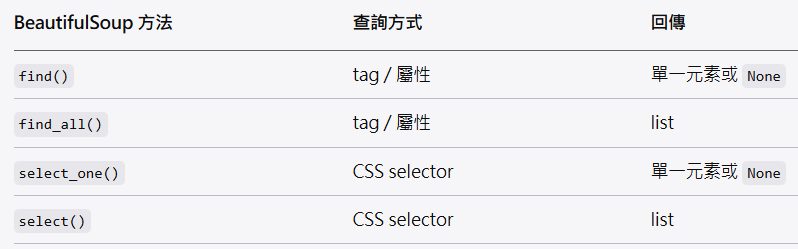
👉 可以把它理解成:
find / find_all = Python 風格 API
select_one / select = CSS selector 風格
二、示範用 HTML(不靠外部網站,100% 可驗證)
直接在 Jupyter 貼上執行 👇
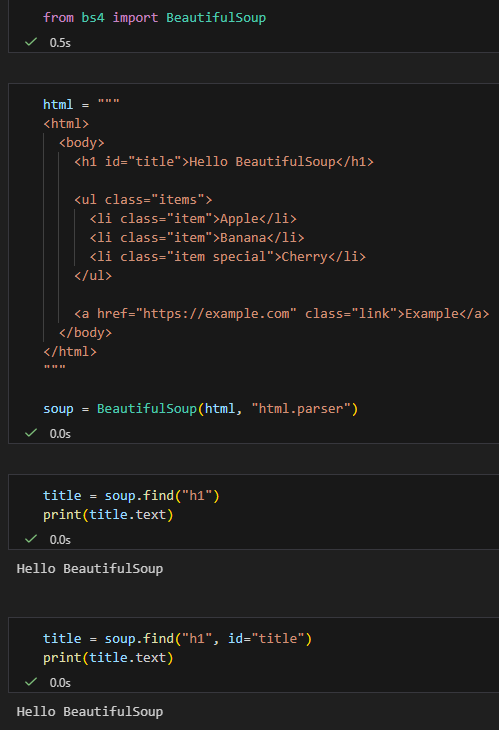
from bs4 import BeautifulSoup範例 HTML
html = """
<html>
  <body>
    <h1 id="title">Hello BeautifulSoup</h1>

    <ul class="items">
      <li class="item">Apple</li>
      <li class="item">Banana</li>
      <li class="item special">Cherry</li>
    </ul>

    <a href="https://example.com" class="link">Example</a>
  </body>
</html>
"""

soup = BeautifulSoup(html, "html.parser")三、find vs select_one(找「第一個」)
✅ find:用 tag + 屬性
title = soup.find("h1")
print(title.text)
title = soup.find("h1", id="title")
print(title.text)✅ 特點:
- 直觀
- 適合「我知道 tag 名稱」
✅ select_one:用 CSS selector
title = soup.select_one("#title")
print(title.text)link = soup.select_one("a.link")
print(link["href"])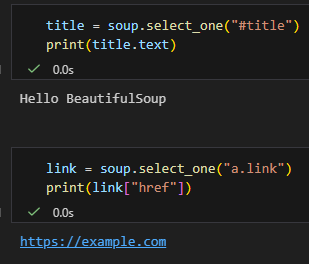
✅ 特點:
- 跟前端 CSS 一樣
- 支援
#id,.class, 層級選擇
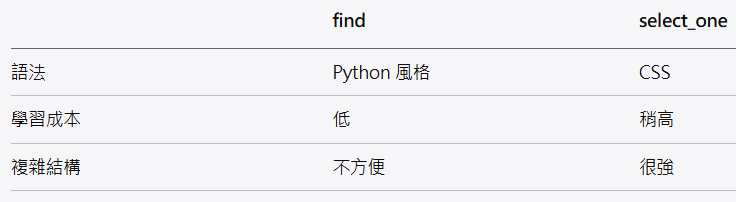
🔍 差異小結
四、find_all vs select(找「多個」)
✅ find_all
items = soup.find_all("li", class_="item")
for i in items:
    print(i.text)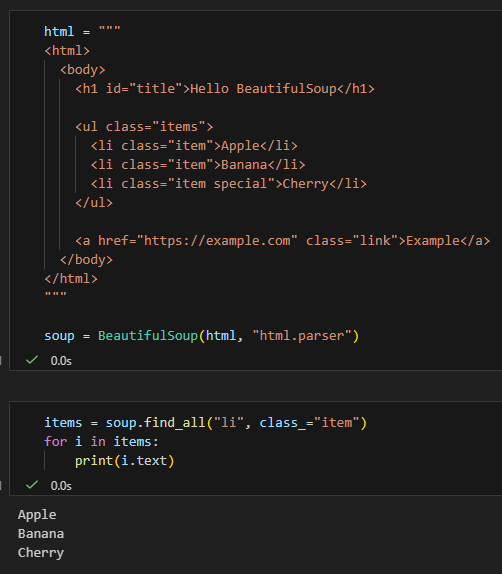
⚠️ 注意:
class是 Python 關鍵字 → 要寫class_
✅ select
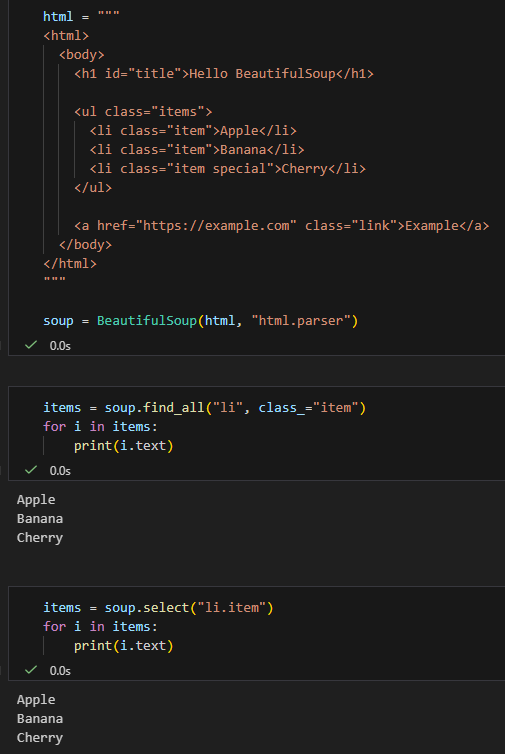
找「特定條件」
special = soup.select("li.item.special")
print(special[0].text)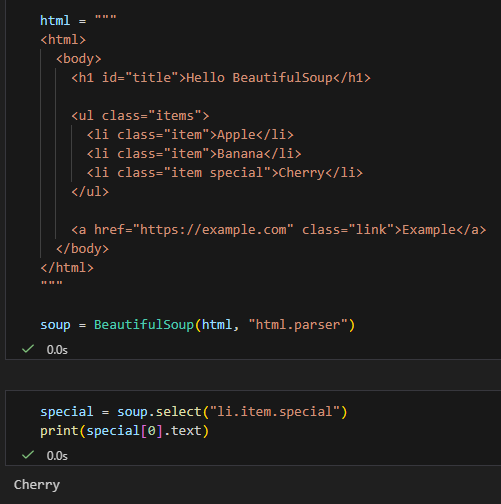
五、實務對照範例(超常用)
情境:找 ul.items 底下的 li
find_all 寫法
ul = soup.find("ul", class_="items")
lis = ul.find_all("li")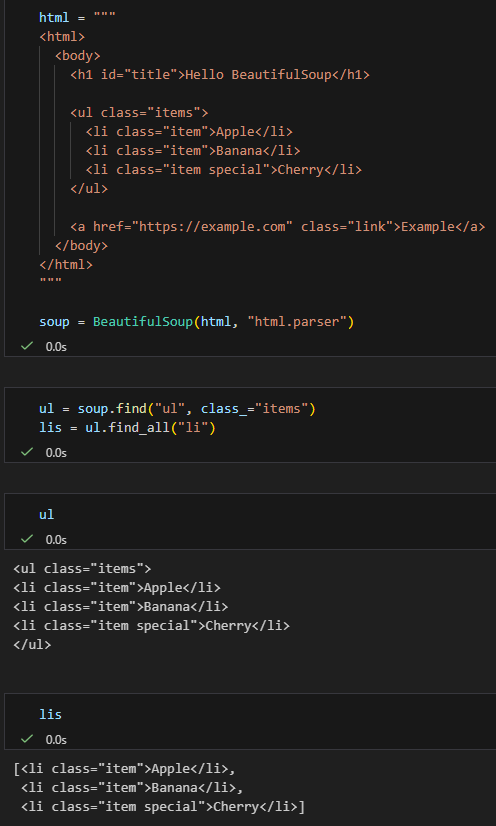
select 一行搞定
lis = soup.select("ul.items > li")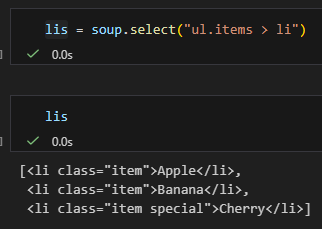
👉 select 在層級結構上更直覺
六、什麼時候該用哪個?
✅ 建議用 find / find_all 的情況
- HTML 結構簡單
- 只靠 tag 或 class
- 想寫得清楚、好讀
✅ 建議用 select / select_one 的情況
- 結構複雜
- 有父子、層級、條件
- 你熟 CSS selector
七、進階補充:回傳型態一樣嗎?
type(soup.find("h1"))
type(soup.select_one("h1"))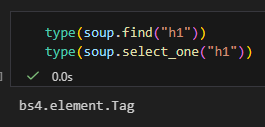
✅ 一樣,都是 bs4.element.Tag
type(soup.find_all("li"))
type(soup.select("li"))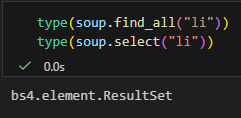
✅ 一樣,都是 bs4.element.ResultSet
bs4.element.ResultSet不是set,
它「沒有不重複的特性」,行為幾乎等同於list。
名字裡的 Set 很誤導,但不是數學意義或 Python 的 set。
bs4.element.ResultSet 是 list 的子類別,不是 set;
名字裡的 Set 只代表「一組結果」,沒有任何去重特性。
from bs4 import BeautifulSoup

html = "<ul><li>A</li><li>A</li></ul>"
soup = BeautifulSoup(html, "html.parser")

results = soup.find_all("li")

print(isinstance(results, list))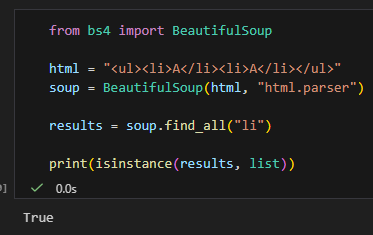
八、一句話總結(記這句就好)
find/find_all跟select_one/select是
「功能對應、語法不同」的兩套系統。
簡單用 find,複雜用 select。
推薦hahow線上學習python: https://igrape.net/30afN
簡短結論(先記這句)
✅
soup(BeautifulSoup 物件)跟Tag物件,
都可以使用find / find_all / select / select_one這些方法。
因為它們共用同一套搜尋 API。
一、為什麼 soup 跟 tag 都能用?
背後原因(設計觀念)
BeautifulSoup(soup)bs4.element.Tag
都實作了相同的搜尋介面
你可以把它們想成:
🔍「一個可以當作『搜尋起點』的節點」
soup→ 從整份文件開始找tag→ 從某個節點底下開始找
二、直接驗證(Jupyter 可貼)
# %%
from bs4 import BeautifulSoup

html = """
<div class="box">
  <p>Hello</p>
  <p class="target">World</p>
</div>
"""

soup = BeautifulSoup(html, "html.parser")
box = soup.find("div", class_="box")

print(soup.find("p").text)
print(box.find("p").text)

print(soup.select_one(".target").text)
print(box.select_one(".target").text)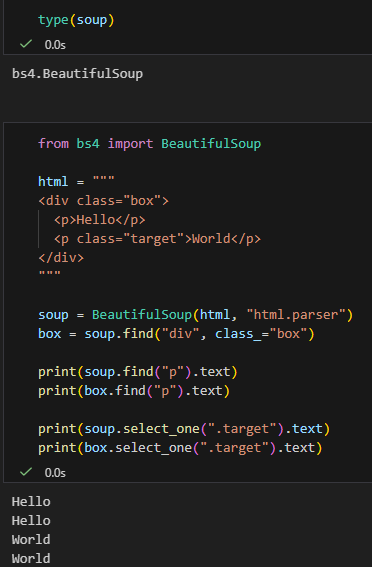
✅ 四行都會正常輸出
三、差別只有一個:搜尋範圍
✅ 用 soup
soup.find_all("p")👉 搜整份 HTML
✅ 用 tag
box.find_all("p")👉 只搜 <div class="box"> 裡面
四、支援的方法一覽(重點)
這些方法 soup 跟 tag 都能用 ✅

五、那 ResultSet 呢?(補充)
find_all() / select() 回傳的是 ResultSet
👉 它本身不是搜尋節點
items = soup.find_all("p")
items.find("span") # ❌ 會錯要這樣用 👇
for p in items:
p.find("span")六、實務上很常見的寫法(推薦)
✅ 先縮小範圍,再找
article = soup.find("article")
title = article.find("h1")
content = article.select("p")👉 效能好、語意清楚、不容易誤抓
七、一句話總結(教學文等級)
在 BeautifulSoup 裡,只要是「節點」(soup 或 Tag),
就能當作搜尋起點使用find / select;
差別只在搜尋範圍,不在 API。
推薦hahow線上學習python: https://igrape.net/30afN
 與 os.stat() 讀懂檔案資訊; from pathlib import Path ; type(p).__name__ #’WindowsPath’; p.stat().st_size == os.stat(p).st_size == os.path.getsize(p)")
? 為什麼 np.nan == np.nan 返回 False? numpy.isnan() ; pandas.isna() ; pandas.isnull() ; np.isnan() 只能處理數值型資料(np.nan) ; pd.isna() , pd.isnull() 除了np.nan以外,還可以處理None, pd.DataFrame, pd.Series")
")


![Python: 資料格式如 List[dict],如何快速將SN加入每一個dict中,以利Excel輸出?如何解包dict? **dict ; 將List[dict]的資料轉為pandas.DataFrame 長什麼樣子?](https://i0.wp.com/savingking.com.tw/wp-content/uploads/2024/02/20240208093926_0.png?quality=90&zoom=2&ssl=1&resize=350%2C233 "Python: 資料格式如 List[dict],如何快速將SN加入每一個dict中,以利Excel輸出?如何解包dict? **dict ; 將List[dict]的資料轉為pandas.DataFrame 長什麼樣子?")
")

![Python: 如何使用pandas.to_numeric ( df['numbers'], errors='coerce') 將非數值型資料轉為NaN? df['numbers'].describe() 簡述統計資料 - 儲蓄保險王](https://savingking.com.tw/wp-content/uploads/2024/05/20240501052102_0-520x245.png)

近期留言